3 - Security Settings Guide
Return to Guides | Return Home | Previous Guide | Next Guide
This guide will give you the information about the one security change that is recommended to make in the security settings of your OpenDNS account. Technically, this step is optional, however I personally would recommend it.
STEP 1:
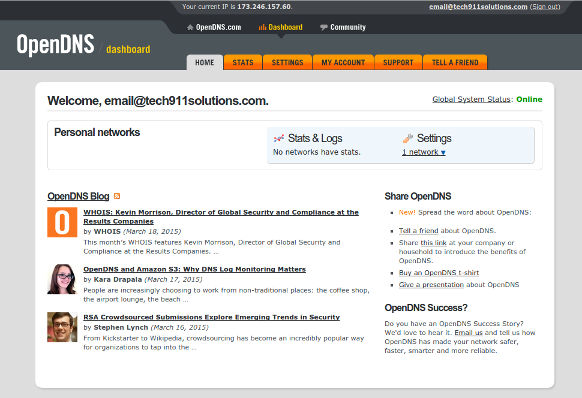
Login to the OpenDNS account you wish to configure. It will bring you to a page that should bring you to your dashboard home page, which should look somewhat like this:

STEP 2:
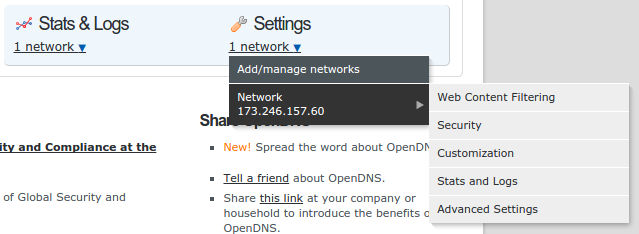
Click on the link that says "1 network" under "Settings" in the blue box near the top right of the page. When you do, you should see this:

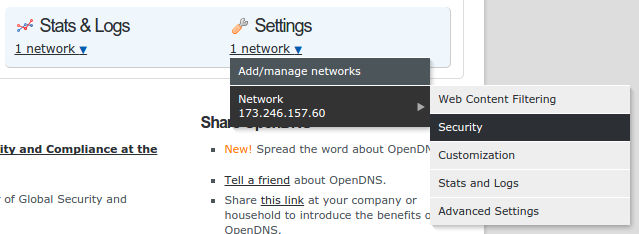
Click on the network you wish to change. You will see a sub-menu pop up, which should look like this:

Click on "Security" to open the page where you will be able to change the internet security settings of the DNS service.

STEP 3:
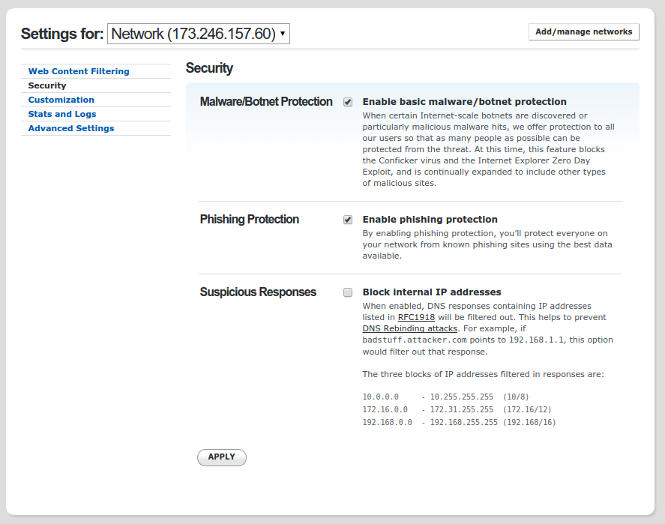
On the security settings page, by default only the top two check boxes will be checked (as shown below). Click the "Block Internal IP Addresses" check box, thereby making sure that all 3 check boxes are checked.

Once your security settings resemble the image below, click the "Apply" button at the bottom of the white box on the page to save the change(s). When you are done, you will receive a confimation above the box like this:

Return to Guides | Return Home | Previous Guide | Next Guide
"Daddy I love you!"
Yours Forever,
-- Your Personal Pet


